Diferencia entre revisiones de «Lo básico»
| (No se muestran 122 ediciones intermedias de 8 usuarios) | |||
| Línea 1: | Línea 1: | ||
[[Category:Help]] | |||
=== Razas=== | |||
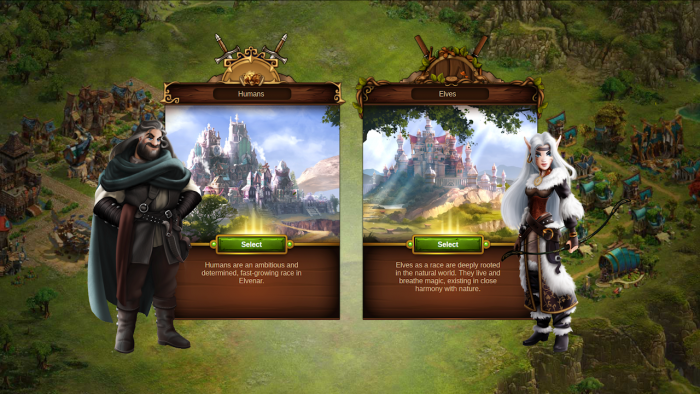
Tras registrar tu cuenta e iniciar sesión en un mundo (servidor del juego), tendrás que elegir si quieres jugar con Elfos o Humanos. | |||
[[File:Race Selection_New.png|700px|center]] | |||
El juego será similar con ambas razas, pero tu elección va a influenciar algunas de las características principales: | |||
# La apariencia de tu ciudad dependerá de la raza que hayas elegido. Los Elfos son seres mágicos y viven en estrecha armonía con la naturaleza. Su diseño de edificios será muy sofisticado. Los humanos son muy ambiciosos y tienen un estilo más medieval e industrializado. | |||
# Las [[Unidades|unidades]] militares que tendrás a tu disposición también serán distintas. Por ejemplo, los Elfos se basarán, entre otros, en [[Treant]] y los Humanos en [[Bárbaro con hacha|Bárbaros con hacha]]. | |||
Pueden haber mundos diferentes (servidores de juego), para que tengas la oportunidad de probar y jugar en ambas razas. | |||
= | === Mapa de la ciudad=== | ||
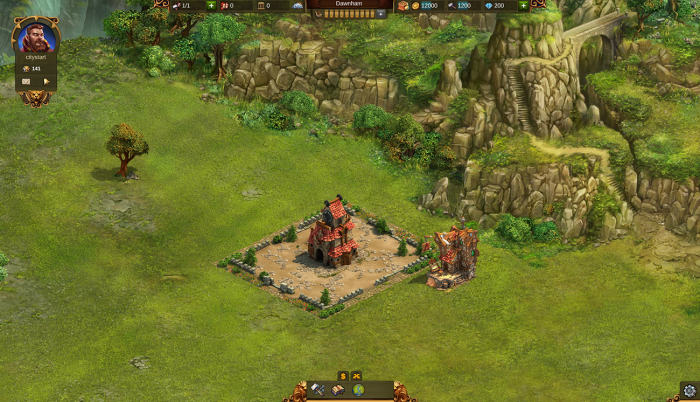
Al principio, comienzas con un área limitada para construir tu ciudad. El mapa de la ciudad es una área dividida en cuadrados, similar a una cuadrícula, donde podrás colocar tus primeros edificios con el fin de iniciar el desarrollo de tu ciudad. Comenzarás con un cuadrante de 15x10. | |||
[[File:city_start_human.png|700px|center]] | |||
Pero, por supuesto, tu objetivo es expandirte y tu mayor desafío es hacer el mejor uso del espacio a tu disposición. Para incrementar tu área construible puedes desbloquear expansiones en el árbol tecnológico, ganarlos completando todos los encuentros en una provincia o comprar una expansión premium. Cada expansión del mapa de la ciudad tiene una área de 25 cuadrados (5x5). | |||
Al principio, encontrarás dos edificios en el mapa de la ciudad: el Capitolio y la Cabaña de los obreros. | |||
*El '''[[Capitolio|Capitolio]]''' es el centro de tu ciudad y actúa como tu depósito principal. La mayoría de los edificios necesitan estar conectados a él mediante calles para que puedan ser funcionales. | |||
*En la '''[[Cabaña de los obreros|Cabaña de los obreros]]''' encontrarás a tus obreros. Ellos te ayudarán a construir y mejorar edificios e incluso a gestionar tus construcciones actuales. | |||
=== Recursos básicos === | |||
Hay dos recursos básicos en Elvenar, los cuales te ayudarán a hacer crecer tu ciudad: | |||
[[File:HUDbasic.png|center|Barra superior, mostrando los recursos básicos disponibles]] | |||
*Monedas: Las monedas se producen automáticamente en las [[Vivienda|Viviendas]]. | |||
*Provisiones: Para producir provisiones tienes que realizar un pedido en el [[Taller|Taller]]. Cada tipo de provisión necesita un tiempo distinto. | |||
{|align="center" cellpadding="1" width="100%" | |||
|style="background-color:#af895f;|'''Consejo:''' En cuanto estén hechas, ¡puedes recoger todas tus producciones a la vez! Solo tienes que hacer click en un edificio de producción y mover el ratón por el resto de edificios (sin soltar el botón). | |||
|} | |||
=== Primeros Pasos === | |||
[[File:mentor_elves.png|right|link=]] | |||
Al inicio del juego deberías preocuparte por tres cosas: | |||
Primero, '''no puedes tener una ciudad sin habitantes (población)'''. | |||
Cuando empieces a construir en tu ciudad, debes construir unas cuantas viviendas primero. Esto te asegurará tener población disponible y te generará monedas. La mayoría de los edificios que querrás construir requerirán habitantes, los cuales podrán trabajar en esos edificios, y los costes de construcción consistirán, sobre todo, en monedas, las cuales serán generadas en tus viviendas. Es recomendable que construyas al menos ocho viviendas al principio. Son baratas y se construyen enseguida. Acuérdate de conectarlas al Capitolio mediante calles. | |||
Segundo, ''necesitas producir provisiones en cuanto tengas tus viviendas construidas.''' | |||
Son un recurso muy valioso utilizado para construir algunos edificios y, posteriormente, también para producir productos y para entrenar tus unidades de batalla. Las provisiones pueden ser producidas en talleres, por lo que es recomendable que construyas tres de estos tan pronto tengas algunas viviendas. Con suficientes monedas y provisiones, tu economía ya estará en marcha y funcionando sin problemas. | |||
Y tercero, '''necesitarás [[Cultura|edificios culturales]] en tu ciudad.''' Esto te permitirá mejorar otros edificios y mantener tu población produciendo con máxima eficiencia. El espacio de tu ciudad es limitado, y siempre lo será. Así que, mejorar edificios para mejorar sus propiedades es clave para sacar el máximo provecho del espacio que tienes disponible. Para mejorar, necesitarás tanto monedas como provisiones, así como habitantes y [[Cultura|cultura]]. Por lo tanto, y con el fin de avanzar tu ciudad, siempre asegúrate de tener un adecuado excedente de cultura. | |||
Si tienes disponible más [[Cultura|cultura]] que la requerida para las mejoras, tus ciudadanos estarán más contentos y su producción será más eficiente. De cierta forma, esta será la manera más barata de ganar más monedas y provisiones. Eso sí, ¡no exageres! No tiene sentido tener una ciudad llena de [[Cultura|edificios culturales]] sin tener [[Vivienda|viviendas]] en las que vivir. | |||
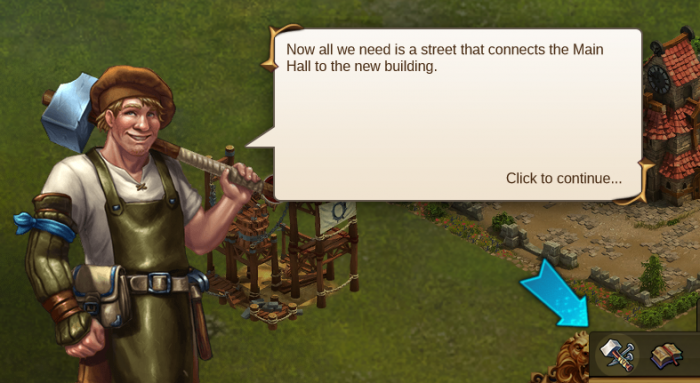
Para hacerlo más sencillo, sólo sigue al guía quien te mostrará las primeras partes y el como comenzar a crear tu ciudad: | |||
[[File:Begin1.png|center|700px]]<br> | |||
[[File: | |||
[[File:Guide1.png|center|700px]] | |||
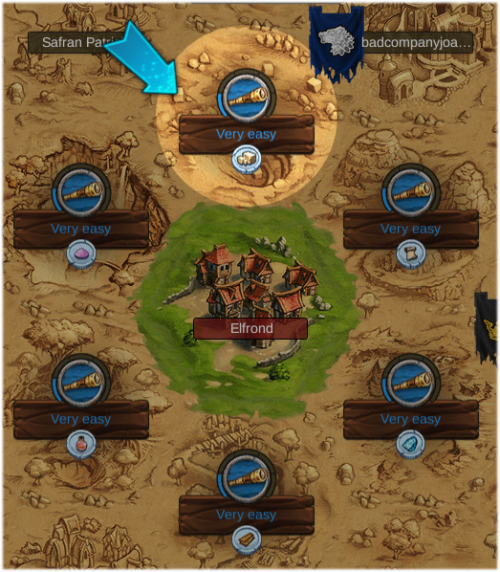
Una vez tu ciudad este creciendo, será tiempo para ir al '''[[Mapa mundial|Mapa Mundial]]'''. Allí será donde podrás ver a tus Vecinos, explorar Provincias, resolver Encuentros y empezar a coleccionar items como '''[[Reliquias]]''' y Puntos de Conocimiento. | |||
[[ | [[File:Worldmap1.png|center|500px]] | ||
====Primeras Misiones==== | |||
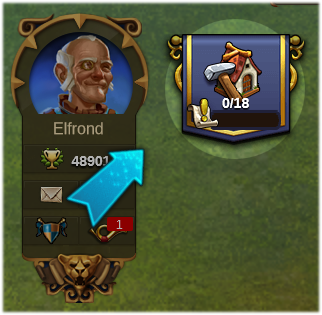
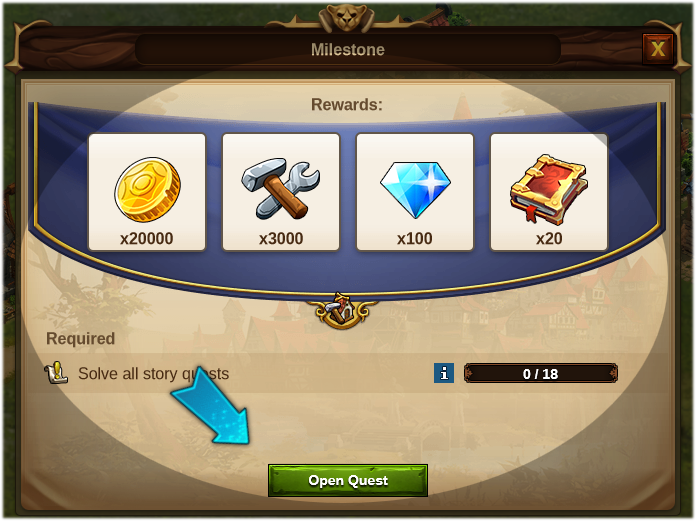
Para ampliar tu experiencia en el juego y ayudarte a construir tu ciudad, se te pedirá que completes una serie de misiones simples: | |||
[[File:Firstquests1.png|center]] | |||
[[File:Firstquestwindow1.png|center|700px]] | |||
¡Completa todas estas misiones para obtener una increíble recompensa de principiante! | |||
Y como último consejo para principiantes: '''¡Escuchad a vuestros asesores!''' Si completas misiones regularmente, serás recompensado generosamente y va a ser más fácil que puedas continuar y avanzar en el juego. | |||
Revisión actual - 16:48 11 jul 2020
Razas
Tras registrar tu cuenta e iniciar sesión en un mundo (servidor del juego), tendrás que elegir si quieres jugar con Elfos o Humanos.
El juego será similar con ambas razas, pero tu elección va a influenciar algunas de las características principales:
- La apariencia de tu ciudad dependerá de la raza que hayas elegido. Los Elfos son seres mágicos y viven en estrecha armonía con la naturaleza. Su diseño de edificios será muy sofisticado. Los humanos son muy ambiciosos y tienen un estilo más medieval e industrializado.
- Las unidades militares que tendrás a tu disposición también serán distintas. Por ejemplo, los Elfos se basarán, entre otros, en Treant y los Humanos en Bárbaros con hacha.
Pueden haber mundos diferentes (servidores de juego), para que tengas la oportunidad de probar y jugar en ambas razas.
Mapa de la ciudad
Al principio, comienzas con un área limitada para construir tu ciudad. El mapa de la ciudad es una área dividida en cuadrados, similar a una cuadrícula, donde podrás colocar tus primeros edificios con el fin de iniciar el desarrollo de tu ciudad. Comenzarás con un cuadrante de 15x10.
Pero, por supuesto, tu objetivo es expandirte y tu mayor desafío es hacer el mejor uso del espacio a tu disposición. Para incrementar tu área construible puedes desbloquear expansiones en el árbol tecnológico, ganarlos completando todos los encuentros en una provincia o comprar una expansión premium. Cada expansión del mapa de la ciudad tiene una área de 25 cuadrados (5x5).
Al principio, encontrarás dos edificios en el mapa de la ciudad: el Capitolio y la Cabaña de los obreros.
- El Capitolio es el centro de tu ciudad y actúa como tu depósito principal. La mayoría de los edificios necesitan estar conectados a él mediante calles para que puedan ser funcionales.
- En la Cabaña de los obreros encontrarás a tus obreros. Ellos te ayudarán a construir y mejorar edificios e incluso a gestionar tus construcciones actuales.
Recursos básicos
Hay dos recursos básicos en Elvenar, los cuales te ayudarán a hacer crecer tu ciudad:
- Monedas: Las monedas se producen automáticamente en las Viviendas.
- Provisiones: Para producir provisiones tienes que realizar un pedido en el Taller. Cada tipo de provisión necesita un tiempo distinto.
| Consejo: En cuanto estén hechas, ¡puedes recoger todas tus producciones a la vez! Solo tienes que hacer click en un edificio de producción y mover el ratón por el resto de edificios (sin soltar el botón). |
Primeros Pasos
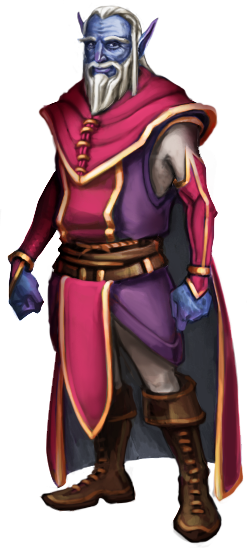
Al inicio del juego deberías preocuparte por tres cosas:
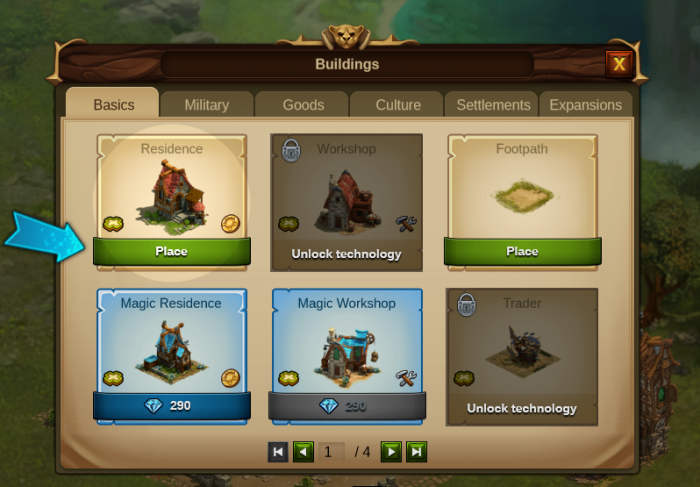
Primero, no puedes tener una ciudad sin habitantes (población). Cuando empieces a construir en tu ciudad, debes construir unas cuantas viviendas primero. Esto te asegurará tener población disponible y te generará monedas. La mayoría de los edificios que querrás construir requerirán habitantes, los cuales podrán trabajar en esos edificios, y los costes de construcción consistirán, sobre todo, en monedas, las cuales serán generadas en tus viviendas. Es recomendable que construyas al menos ocho viviendas al principio. Son baratas y se construyen enseguida. Acuérdate de conectarlas al Capitolio mediante calles.
Segundo, necesitas producir provisiones en cuanto tengas tus viviendas construidas.' Son un recurso muy valioso utilizado para construir algunos edificios y, posteriormente, también para producir productos y para entrenar tus unidades de batalla. Las provisiones pueden ser producidas en talleres, por lo que es recomendable que construyas tres de estos tan pronto tengas algunas viviendas. Con suficientes monedas y provisiones, tu economía ya estará en marcha y funcionando sin problemas.
Y tercero, necesitarás edificios culturales en tu ciudad. Esto te permitirá mejorar otros edificios y mantener tu población produciendo con máxima eficiencia. El espacio de tu ciudad es limitado, y siempre lo será. Así que, mejorar edificios para mejorar sus propiedades es clave para sacar el máximo provecho del espacio que tienes disponible. Para mejorar, necesitarás tanto monedas como provisiones, así como habitantes y cultura. Por lo tanto, y con el fin de avanzar tu ciudad, siempre asegúrate de tener un adecuado excedente de cultura.
Si tienes disponible más cultura que la requerida para las mejoras, tus ciudadanos estarán más contentos y su producción será más eficiente. De cierta forma, esta será la manera más barata de ganar más monedas y provisiones. Eso sí, ¡no exageres! No tiene sentido tener una ciudad llena de edificios culturales sin tener viviendas en las que vivir.
Para hacerlo más sencillo, sólo sigue al guía quien te mostrará las primeras partes y el como comenzar a crear tu ciudad:
Una vez tu ciudad este creciendo, será tiempo para ir al Mapa Mundial. Allí será donde podrás ver a tus Vecinos, explorar Provincias, resolver Encuentros y empezar a coleccionar items como Reliquias y Puntos de Conocimiento.
Primeras Misiones
Para ampliar tu experiencia en el juego y ayudarte a construir tu ciudad, se te pedirá que completes una serie de misiones simples:
¡Completa todas estas misiones para obtener una increíble recompensa de principiante!
Y como último consejo para principiantes: ¡Escuchad a vuestros asesores! Si completas misiones regularmente, serás recompensado generosamente y va a ser más fácil que puedas continuar y avanzar en el juego.
